
Resources » Get Creative With PDFs »
Educational PDFs and the Paperless Classroom
This quick tutorial shows how teachers can use PDFLive to turn PDFs into editable, fillable forms that students can use on their devices for homework and studying.
There are a lot of reasons to reduce the volume of paper used in the classroom. Digital and remote classes make physical papers difficult to distribute and collect. Environmental concerns have led to reducing the use of paper as well as plastic pens, binders, and other materials needed to organize paper handouts.
Finding the right digital alternative to physical paper is no easy task. Not every student will have access to the same document editing software. Documents that you, the teacher, create may lose their formatting settings when opened by a student.
This is why PDFs are so useful. The portable document format, or PDF, is easy to create and will look the same no matter who opens it on any device. PDFs are the best format to distribute syllabi, study guides, and even worksheets that students can fill out. This allows any student to do their homework entirely on their computer rather than writing on paper.
In this article, we’re going to cover how you can work with PDFs using PDF.Live’s online PDF editor tool. The editor tool allows you to make alterations to the settings and format of a PDF.
How to Make an Editable PDF
Before you make a PDF editable, you may be wondering how you can make a PDF in the first place? The document editing software you already use has this capability. How do we know this?
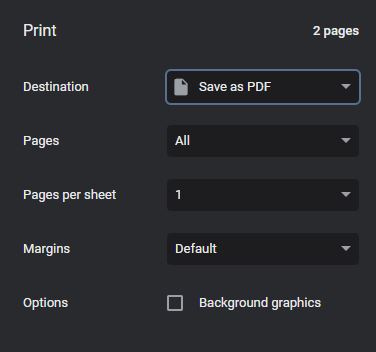
Well, if you’ve built a worksheet or syllabus in a doc editor, you’ve probably printed it. When printing, you’ll usually select your printer in the Destination section. Then, if you click the dropdown next to it, you’ll see Save as PDF as an option. Your experience may differ, depending on your operating system (iOS vs Windows, for example), but generally, most software programs allow you to save as PDF from the printing functions.
This will save your document as a PDF file instead of printing a physical copy. If you simply want to distribute a worksheet that your students will then print and fill out, emailing or uploading a PDF is by far the best option. This will ensure every student can print out the same version of the worksheet with no changes in formatting settings.
If you create a Microsoft Word Document and upload the file as, say, a .doc or .docx file, there’s a good chance the page’s margins and lines will be altered. This can lead to students being confused about where one question begins and another ends, or having enough space to fill out the answer for a question.
However, if you want your students to work with the document in an entirely digital format, we have a solution for you.
Form Field Recognition
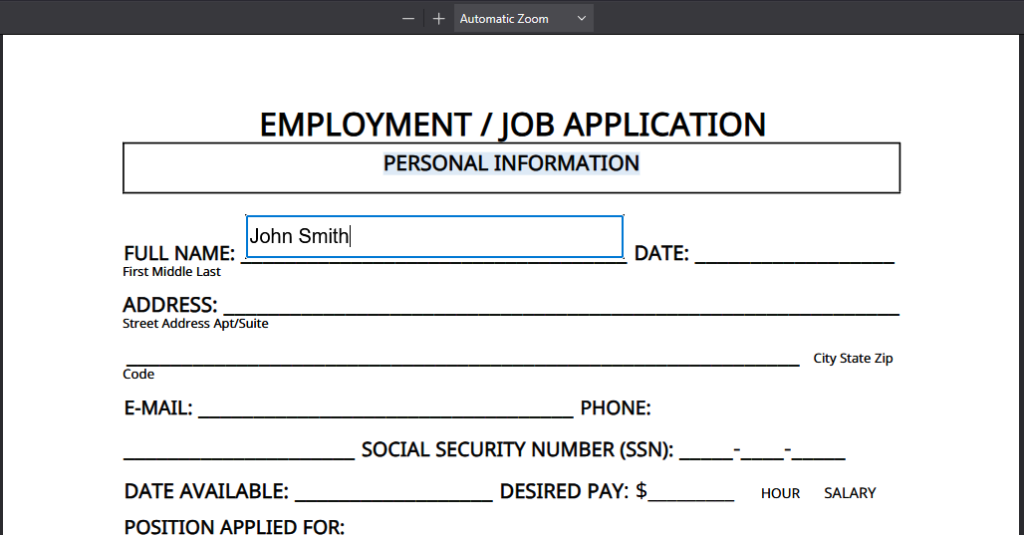
What is form field recognition? This term is the name of a tool contained within the PDF.Live editor that will find fields within a PDF that are intended to be filled out by the person using the document. It will add a fillable form field to the line so that text can be typed within the PDF. In this example, every slightly shaded in box above an empty line is a fillable field:
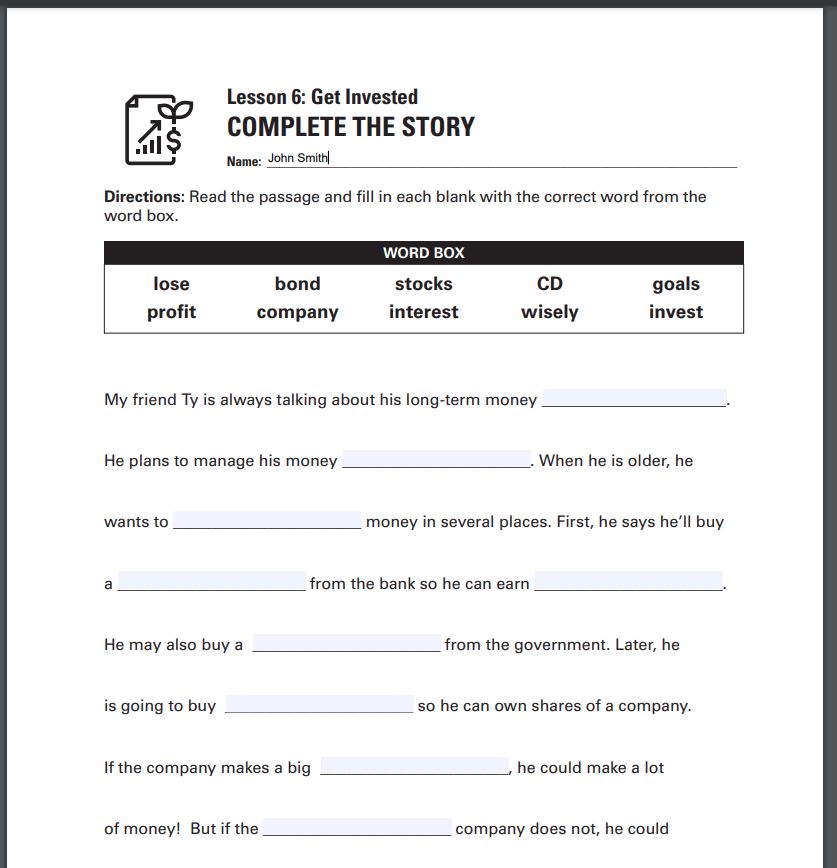
(Source: FDIC “Smart Money Instructor Guide” for classrooms.)
So how do you access the form field recognition tool?
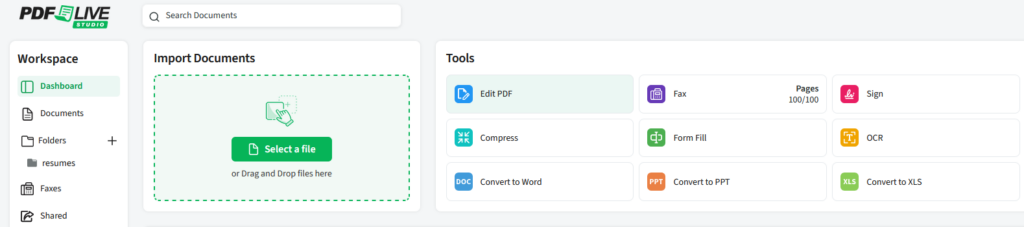
Upload your PDF to our online editor selecting the Edit PDF option in the PDF.Live Studio.
Once you’ve selected this option, either upload a PDF from your computer or select a PDF already uploaded to the editor.
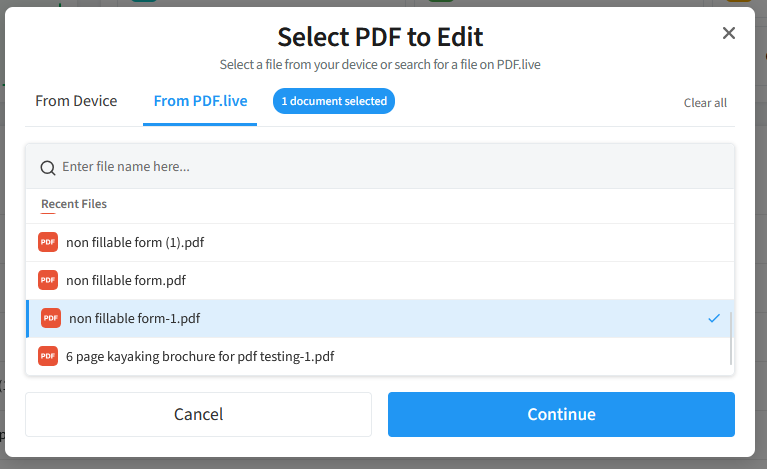
Once you’ve done this, select Continue. In the PDF.Live editor toolbar, navigate to Form Fill tab and select Insert Text Field within the Form tab of the toolbar.

With this tool selected, you can now create text fields in the PDF that someone can fill out!
To create a new field, click and drag anywhere on your PDF. The new box will then be a fillable field for anyone with access to your PDF.
Once you’ve created fields, simply click one of the text fields with the tool active. You can then resize, move, or delete them by clicking the trash can icon.
Once you’re happy with your form fields, select Download in the top right-hand corner of the editor to get a copy of your PDF with fillable fields applied to it.

In this example, we’ve opened the fillable form PDF in a web browser. We’ve filled in a couple of fields with text. Once all text has been filled in, when downloading the PDF, the owner will be prompted to download a new version of the PDF with changes. The “changes” represent the text that’s been typed out into the fillable forms within the PDF.
Using this tool, you can send out worksheets to your students, have them fill them out, and send them back without any PDF editors or physical paper needed!